
How to Clean a Dog’s Ears Safely and Effectively
Preparation before Cleaning
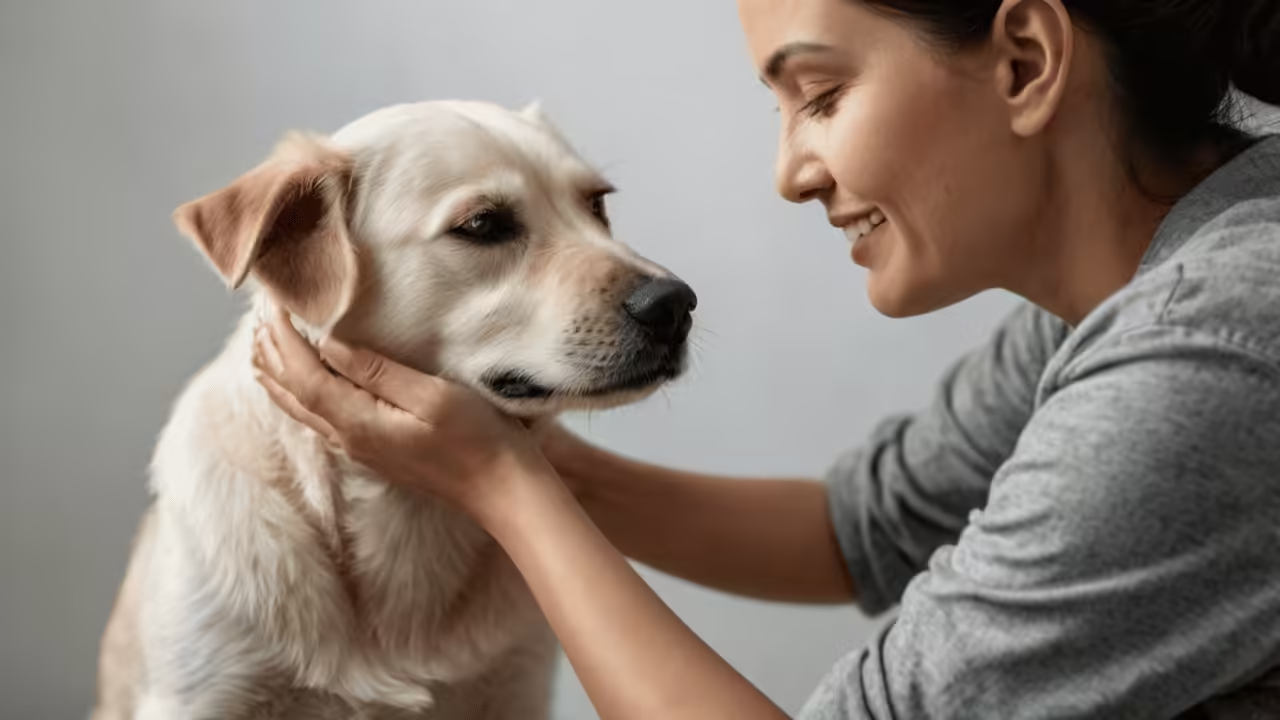
All equipment needed for cleaning a dog’s ears should be gathered before proceeding. This will include ear cleaning solution specifically made for dogs, cotton balls or pads, and some treats to give your furry friend for their good behavior. The process can also be made less stressful for you and your dog if the place is calm and quiet.
It is very important to understand the anatomy of a dog’s ear to know how to clean it properly and safely. Dogs have a vertical ear canal, which predisposes them to ear infections if moisture and debris are not regularly removed. If you know how a dog’s ear is structured, you will be able to clean the ears in a manner that promotes good ear health and prevents complications.
- First, prepare all the materials needed before you start the cleaning process
- Ear cleaning solution with accompanying cotton balls or pads and treats for your dog
- Provide a calm and quiet atmosphere to make it easier on you and your dog during the cleaning process
Knowing how to clean a dog ear requires an understanding of a dog ear anatomy.
Dogs have a vertical ear canal that makes them prone to infections if moisture and debris are not regularly removed.
Get to know the structure of a dog’s ear to promote good ear health and prevent complications.
Understanding the Anatomy of a Dog’s Ear
The ear anatomy of a dog seems very complex as such when at first sight, but still is vital to understand as it consists of a vertical ear canal leading straight to the eardrum; hence it’s very sensitive. Cleaning a dog’s ear in a safe way requires a very good understanding of the anatomy to avoid hurting your pet in the process.
How to Socialize a Puppy: Tips for Raising a Friendly and Confident Dog
There are so delicate structures found along the inside canal of the ears, which, among other thing, comprises earwax -producing glands and eardrum. In maintaining the cleaning operation, caution is quite necessary since, if a piece of this organ is torn even slightly, things can easily escalate to some permanent damage. Becoming well-exposed to canine ear anatomy ensures knowing how best and safely you’re going to end up cleaning around your pup without putting it on risk.
- In dogs, the vertical ear canal opens up into the eardrum. Therefore, caution must be exercised when cleaning.
- Fragile structures in a dog’s ear include the ear canal, the eardrum, and the glands that create earwax.
- Being gentle and careful when cleaning can help avoid the sensitive areas getting damaged.
- Knowing the ear anatomy of a dog can ensure that you properly take care of your pup’s ears.
Tools Needed
Most tips on how to clean dog ears stress the need to have the right materials to make things run much smoother and efficiently. A vet-approved ear cleaning solution, specifically made for dogs, is must-have material for safe and effective cleaning. Cotton balls or pads also come in handy while applying the cleaning solution and wiping all the debris from the ears without causing irritation.
Another essential supply for dog ear cleaning is a pair of soft, pet-friendly ear wipes. These can be used for quick touch-ups between more thorough cleaning sessions to help keep your dog’s ears clean. Finally, a comfortable, well-lit space to clean in, along with treats to reward your dog for his cooperation, will make the process easier on both you and your furry friend.
- Veterinary-approved ear cleaning solution
- Cotton balls or pads
- Mild, pet-safe ear wipes
- A comfortable and well-lit area to clean in
- Treats to reward cooperation
Checking the Ears for Signs of Infection
Inspecting the ears of your dog for infections is an essential part of taking care of your dog’s ear health. Cleaning a dog’s ears effectively requires a thorough checkup to ensure that any infection is caught before it gets out of hand. Look for redness, swelling, discharge, foul odor, or excessive scratching in and around the ears. All these are possible symptoms of infection, and it would be best to address them before they get out of hand.
You should also look for any cuts, abrasions, or foreign objects that may have been lodged in the ears, which could eventually lead to infection. Checking your dog’s ears often can help you avoid discomfort and health issues in the future. Early detection is essential in the management of ear problems in your furry friend.
Inspecting your dog’s ears for signs of infection is crucial for their ear health.
- Look for redness, swelling, discharge, foul odor, or excessive scratching in and around the ears
- These could be indicators of infection that need to be addressed promptly
- Check for cuts, abrasions, or foreign objects lodged in the ears that could lead to infection
- Regular inspection can help prevent discomfort and potential health issues
- Early detection is key in managing ear problems in your furry friend.
Applying the Cleaning Solution
Once you have all the supplies needed for dog ear hygiene, it is time to apply the cleaning solution. Remember, using a specialized solution designed for dogs is crucial to prevent any irritation or reactions.
Begin by gently tilting your dog’s head to the side, lifting the ear flap, and then squirting the appropriate amount of the cleaning solution into the ear canal. Do not push the tip of the bottle in too far as this may be painful for your furry friend. Allow the solution to sit in the ear for a few seconds before gently massaging the ear base to dislodge dirt or debris.
- Gently tilt the dog’s head to the side
- Lift up the ear flap
- Squirt in gently the appropriate amount of cleaning solution in the ear canal
- Don’t let the tip of the bottle go in too deep
- Let it stay in the ear for a few seconds
- Gently rub the base of the ear to loosen up dirt or debris
Gently Massaging the Ear Base
The final action to be performed after the application of the natural dog ear cleaning solution is the gentle massage at the base of your dog’s ear. This step is very important in helping dislodge dirt or wax that may have accumulated deep within the ear canal. Gentle massage at the base of the ear helps in distributing the cleaning solution properly and, hence, helps your furry friend achieve better ear health. Remember to apply a light touch and be careful not to disturb your dog in the process.
Gentle massaging at the base of the ear also helps contribute to better circulation in the ear area, which can contribute to subduing inflammation and aiding healing. This is a simple yet important step in maintaining your dog’s ear health and will help prevent potential infections in the ears. Take your time over this and make sure the entire area is covered for optimal results.
- Gently massage the base of your dog’s ear after applying the cleaning solution
- Helps dislodge accumulated dirt or wax deep within the ear canal
- Promotes better ear health for your furry friend
- Use a light touch and be mindful of your dog’s comfort
- Improves circulation to the ear area, reducing inflammation and promoting healing
- Important step in maintaining your dog’s ear health and preventing infections
- Take your time to end up covering the whole area thoroughly for the best results
Removing Excess Solution and Debris
With the cleaning solution now applied to your dog’s ears, you want to ensure that you remove any excess solution and debris that might have been loosened during the cleaning process. Using a clean cotton ball or soft cloth to gently wipe outside the ear canal and the outer ear flap also removes dirt buildup. Be extra careful not to insert anything that may reach back into the actual ear canal-it may cause any discomfort or perhaps even hurt them.
This step is essential to the process of cleaning a dog’s ears at home as it would eliminate any remaining dirt and debris, which could lead to irritation or infection if left untreated. Wipe away all excess solution and debris to ensure your dog’s ears are clean and free of any build-up that may deter their overall ear health. Be gentle and patient when doing this because the experience will not be very comforting for your furry friend.
Outer ear canal and ear flap-cotton ball or soft cloth: Wipe it clean and take away dirt and residue. Nothing should be forced into the ear canal. Home cleaning of dog ears is essential.
- Avoids irritation or infection from the remaining debris
Repeat the Process on the Other Ear
After cleaning one ear, the other ear must also be cleaned. It is essential to clean both ears so that your dog does not suffer from ear infections. Repeating the process will encourage good hygiene practices and prevent any potential ear infections. Always ensure that you are using safe methods for cleaning your dog’s ears to avoid harming or discomforting your furry friend.
To start cleaning the other ear, gather the supplies needed and check for signs of infection. Care should be taken in applying the cleaning solution and massaging the base of the ear gently. Wipe away excess solution and debris to keep your dog’s ear clean and free from buildup. Don’t forget to reward your dog for their cooperation throughout the process. Monitor for signs of discomfort or infection after cleaning is complete to ensure your dog’s ear health is maintained.
- Check the other ear for signs of infection
- Apply cleaning solution and massage gently
- Wipe away excess solution and debris
- Reward your dog for cooperation
- Monitor for signs of discomfort or infection
Rewarding Your Dog for Cooperation
After you have successfully cleaned your dog’s ears following the steps in this guide on how to clean dog ears properly, you should reward your canine companion for their cooperation during the process. Rewarding your dog helps to reinforce positive behavior and creates a pleasant experience for them, making it easier for both of you the next time you need to clean their ears.
Offering them a treat or their favorite toy right after you are done cleaning their ears can be a great way to reward your dog for cooperating with the process. It helps in ensuring that the dog is conditioned to the whole process of cleaning his ears so that the future cleaning becomes enjoyable and likely for them to be cooperative. Remember to use rewards consistently and praise your dog for their good behavior to strengthen the bond between you and make ear cleaning a stress-free experience for your furry friend.
- Offering a treat or favorite toy after cleaning your dog’s ears
- Positive reinforcement helps them associate ear cleaning with something enjoyable
- Consistent rewards and praise can strengthen the bond between you and your dog
Monitoring for Any Signs of Discomfort or Infection
After the DIY dog ear cleaning process, it is important to monitor your furry companion for any signs of discomfort or infection. Keep a close eye on your dog’s behavior in the hours following the cleaning. Look out for any excessive scratching, head shaking, or whining which could indicate potential discomfort or irritation in the ear.
Regularly check ears for redness, swelling, or a foul smell, and even discharge. It might indicate some infection inside, which you will need veterinary assistance for. The earlier the condition is recognized and treated by checking your dog’s ear often, the longer its ears can stay clean and healthy.
Excessive scratching or shaking of head and whining
Redness, swelling, or an odd odor, discharge
FAQs About How to Clean a Dog’s Ear
How often do I need to clean my dog’s ears?
It is best to clean your dog’s ears once a month, but this can be more frequent for a dog with recurring ear infections.
What are the symptoms of ear infection in dogs?
Symptoms of an ear infection in dogs include redness, swelling, odor, discharge, scratching, or head shaking, and even sensitivity in touching the ears.
Can I use regular soap or water to clean my dog’s ears?
The best ear cleaning solution for your dog is a veterinarian-approved one, as soap or water may cause an imbalance in the pH of the ear.
How do I prevent my dog from getting an ear infection?
Prevent ear infections in your dog by cleaning them regularly, making sure their ears stay dry, and by inspecting during the grooming process whether they exhibit any signs of infection or pain.
What if my dog displays discomfort when their ears are being cleaned?
Stop the process right away and refer your veterinarian if your dog exhibits discomfort while being cleaned on their ears as this may be a symptom of an underlying issue that requires intervention.